Crochet Snowflakes Ornaments


From my previous post, I mentioned that another crochet ornaments will be made for our Christmas tree. It was the a simple snowflakes, but Mommy made half a dozen of it and were already placed in the tree.

Our Christmas Tree with crochet ornaments

I found different snowflakes pattern, and here what I picked.

Snowflakes crochet pattern

The pattern is written in a diagram format so you need to check my previous post so you can easily follow the diagram.

Making this one is very easy and you can do one in less than an hour. This means that it is not yet late for you to make your own sets of snowflakes ornaments.

Crochet Snowflakes 


You will need:
White yarn
3.5mm hook
Tapestry needle for weaving
Flat iron

Ironing the finished product will it nicer.

Crochet Snowflakes

Grab your hook and yarn and start doing snowflakes. You can check other free patterns from Wonderful DIY.

Happy Crocheting!
Read More »

Snowman Amigurumi


It’s 27 days until Christmas. I think it is not yet late to share this pattern and there are still enough time to make a dozen of this simple snowman amigurumi as ornament for your Christmas Tree.

The Snowman amigurumi is about 3 inches tall.


Snowman amigurumi
  
You will need
White yarn for the body
Black yarn for the hat
Red yarn for the scarf (you may choose other color)
Orange yarn for the nose
Black beads for the eyes
Fiber fill for stuffing
3.75mm hook
Tapestry needles for weaving

Snowman amigurumi

For the snowman, use white yarn
Round 1.Make a magic ring, Ch2, 10 hdc into the ring, sl-st on top of ch2. Pull the yarn to make a circle.
Round 2. Ch2, hdc on the same st, 2hdc in the next sts. Sl-st on top ch2.
Round 3. Ch2, hdc on the same st, *hdc in next st, 2hdc on the next st**. Repeat * to ** around. Sl-st on top of ch2.
Round 4. Ch2, hdc in each st around. Sl-st on top of ch2.
Round 5. Ch2, hdc in each st around. Sl-st on top of ch2.
Round 6. Ch2, *hdc2tog on the same st and the next st, hdc on the next 4 sts**. Repeat *-** until reaching the last st. Sl-st on top Ch2.
Round 7. Ch2, hdc on each st around. Sl-st on top of ch2.
Round 8. Ch2, *hdc2tog on the same st and the next st, hdc on the next 3 sts**. Repeat *-** until reaching the last st. Sl-st on top Ch2.
Round 9. Ch2, *hdc2tog on the same st and the next st, hdc on the next 2 sts**. Repeat *-** until reaching the last st. Sl-st on top Ch2.
Round 10. Ch2, hdc on the same st, *hdc on the next 2 sts, 2hdc on the next st** the next. Repeat *-**around. Sl-st on top of ch2.
Round 11. Round 10. Ch2, hdc on the same st, *hdc on the next 3 sts, 2hdc on the next st** the next. Repeat *-**around. Sl-st on top of ch2.
Round 12. Ch2, hdc on each sts around.
Round 13. Ch2, *hdc2tog on the same st and the next st, hdc on the next 3 sts**. Repeat *-** until reaching the last st. Sl-st on top Ch2.
Stuff using fiber fill.
Rounf 14. Ch2, *hdc2tog around. Repeat until closed.
Fasten off.
Sew black beads as eyes.
Add nose using orange yarn and smiling lips using black yarn.

For the hat, use black yarn
Round 1. Make a magic ring, Ch2, 10 hdc into the ring, sl-st on top of ch2. Pull the yarn to make a circle.
Round 2. Use back loop only. Ch2, hdc in each st. Sl-st on top of ch2.
Round 3. Ch2, hdc in each st around. Sl-st on top of ch2.
Round 4. Ch2, hdc in each st around. Sl-st on top of ch2.
Round 5. Use front loop only. Ch2, hdc on the same st, 2hdc in each st around. Sl-st on top of ch2.
Fasten off. Sew the hat on the head of the snow man.

For the scarf, use red yarn
Ch60. Hdc on 2nd st from the hook. Hdc on each st. Fasten off.

Next to share is a simple snowflakes ornament.

Happy crocheting!
Read More »

Decors and Ornaments: Christmas Stockings


Christmas is fast approaching. Have you already unboxed and assembled your Christmas tree? Ours was already set on November 1.

Our Christmas Tree
Every year, we used to buy additional ornaments hang on the tree but this year instead of buying, I decided to make crochet items. First is the stockings. I made a dozen of it. Aside from the ornaments, I made a large one for the front door. This is also we will put our gift for Matthew (Shhh…. he know Santa will be the one to put his gift there.)


Crochet Christmas Stocking
Making these items are easy and simple. You will need the basic tools – yarns, hook, tapestry needle for weaving and a pair of scissors.

Crochet Christmas Stockings Ornaments
For Christmas tree’s ornament stockings, here’s what I did:

Toe
Using white yarn.
Ch 3, 10 hdc on the first ch, sl-st on top of ch4.
Ch2, hdc on the same st of ch2, *2hdc on the next, repeat *. Sl-st on top of ch2. Fasten off.
Attach red yarn.
Ch2, hdc on the same st as ch2, hdc on the next sts. Sl-st on top of ch2. Repeat this step 3 more times.
Fasten off.

Heel
Count 5 sts to the right, then attach white yarn. Ch2. Hdc on the next 10 sts to the left. Ch2, turn.
Hdc on the same st as ch2, hdc on each st. Fasten off.

Leg
Attach red yarn, ch2, hdc on each st around including the sides of the white part of the heel. Sl-st on top of the ch2.
Ch2, hdc on each st around. Repeat this step 5 more times. Fasten off.

Cuff
Attach white yarn, ch2, hdc on each st around. Fasten-off and weave ends.

For the front door stocking, I would like to thank favecrafts for sharing a simple and easy to do pattern. 

Instead of doing the cuff in the pattern, I attached the white yarn and crochet on the wrong side, made "backloop only" dc in each stitch around. A silver bell ornament as embellishment was added.

Christmas Stocking on the Front Door
Here is the pattern I used for the stocking - leg to toe only. The complete pattern is  HERE

Leg
With larger hook and B, ch 43.
Row 1 (Right Side): Sc in 2nd ch from hook and in each ch across; turn – 42 sc.
Next Row: Ch 1, sc in each sc across; turn.
Repeat last row until 10" from beginning, end wrong side row. Fasten off.
 
Heel
With right side facing skip 32 sc; join C; ch 1, sc in last 10 sc; bring the other side of the leg around and sc in first 10 sc; turn –20 sc.
Next Row: Ch 1; draw up a loop next 2 sc, yo and draw through all 3 loops on hook – dec made; sc in each sc to last 2 sc; dec; turn –18 sc. 
Repeat last row to dec 1 st each end of every row until 4 sts remain. Work 1 row even. Now inc 1 st (inc = work 2 sc in a st) each end of every row until there are 20 sc. Fasten off.
 
Foot 
With right side facing, skip first 10 sc of heel, join B in next sc; ch 1, sc in last 10 sc of heel, skip row ends of heel, [dec over next 2 sc of leg] twice, sc in next 14 sc, [dec] twice, skip row ends of heel, sc in remaining 10 sc of heel; turn –38 sc. Continue in sc, dec 1 st each end of every 6th row twice – 34 sts. Work even until foot measures 5" from the last row of the heel, end wrong side row, changing to C. Cut B.
 
Toe
Next Row: With C, ch 1, dec, sc in next 13 sc, [dec] twice, sc in next 13 sts, dec; turn – 30 sts.
Next Row: Ch 1, dec, sc in next 11 sc, [dec] twice, sc in next 11 sc, dec; turn – 26 sts.
Next Row: Ch 1, dec, sc in next 9 sc, [dec] twice, sc in next 9 sc, dec; turn – 22 sts.
Next Row: Ch 1, dec, sc in next 7 sc, [dec] twice, sc in next 7 sc, dec; turn – 18 sts.
Next Row: Ch 1, dec, sc in next 5 sc, [dec] twice, sc in next 5 sc, dec; turn – 14 sts.
Next Row: Ch 1, dec, sc in next 3 sc, [dec] twice, sc in next 3 sc, dec; turn – 10 sts. Fasten off.
 
Finishing
Holding right side of cuff against the wrong side of the leg, attach yarn and work slip st in each st across through both layers. Fasten off.
Sew toe, foot, heel, leg and cuff seams. If heel rows have formed gaps in the fabric, weave matching yarn through sts on the wrong side to close them. Turn cuff to the right side.
 
Hanging Loop
With A, ch 13; sc in 2nd ch from hook and in each ch across. Fasten off. Fold in half and sew inside cuff at the seam.

Next to share is a pattern for the snowflakes and Snowman amigurumi.

Happy Crocheting!
Read More »

Halloween Crochet Costumes


Sharing some of our Halloween crochet costumes.

Crochet Vikings Hat and Boots


Crochet Frankie Hat


Our son wearing the Frankie hat. Scary or cute?


Crochet Minnie Mouse hairclips


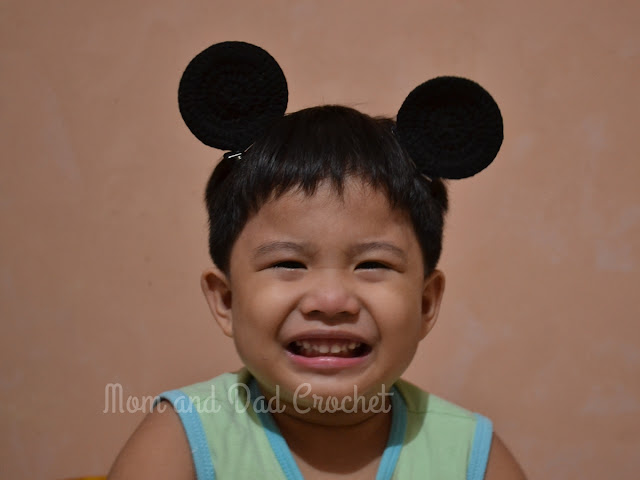
Crochet Mickey Mouse hairclips


Crochet Picachu hat


Crochet Bunny hat and booties


Crochet Bunny booties


There you go our crochet Halloween costumes. Not scary though. Happy Halloween!
Read More »

Crochet Christmas Decor Ideas


The first of the ber months is about to end and we can already smell the breeze of the coming Holiday Season. Some has already stood their Christmas trees, started decorating their homes while others played Christmas songs.

Every year, we used to buy some Christmas decors to add with what we had in the past years. This year, instead of buying, doing DIY decors is a great idea especially now that we don't have that much made-to-order crochet items. Here are the items I want to make:

Santa Claus is definitely in the list. This small amigurumi best fits hanging by the tree.

Santa Ornament (Yanrspiration)
Small Santa Pocket is also great for small presents.

Santa Pocket (The Hooked Haberdasher)

There are some balls where the string is attached were already snapped and I want to turn it into something like this.

Christmas Ball (Simplicity Creative Group)
Stars which symbolizes the guide of the three kings in going to the manger is definitely in the list.

Star Appliques (One Dog Woof)
What can you say about this small wreath hanging by the tree?

Mini Wreath (Just Be Happy) 
Even there is no snow in the tropics, having snowman can let your feel a white Christmas.


How about making the most famous poinsettia flower appliques?

Poinsettia (Knot Your Nana's Crochet)
Instead of the usual ornamental wreath in the front door, I will make couple of personal stockings and I already working with this one.

Christmas Stocking by Fave Crafts

I will be using my spare time in making these items before we start decorating our home for the Holiday Season.

How about you, have you already started decorating your home?
Read More »

Captain America Hat with Earflap


Nice to be back on sharing patterns to fellow crocheters!

Here is a pattern for a simple beanie hat with earflap that would definitely loved by an Avengers fanatic kid especially those who like Captain America.

avengers, captain america, captain america crochet hat, crochet hat,
Captain America Crochet Hat

Materials:
Yarn – 4-ply acrylic yarn, royal blue, red and white
Hook – 3.75mm
Tapestry needle for sewing and weaving

For the hat, do simple beanie first:
Round 1: Ch4, 10 dc to the first ch. Sl-st to the top of ch4.
Round 2: Ch3, dc in the same st as ch3, 2dc in each st around. Sl-st to the top of ch3.
Round 3:  Ch3, dc in the same st as ch3, *dc in the next st, 2dc into the next st. Repeat * around. Sl-st to the top of ch3.
Round 4:  Ch3, dc in the same st as ch3, *dc in the next 2 sts, 2dc into the next st. Repeat * around. Sl-st to the top of ch3.
Round 5:  Ch3, dc in the same st as ch3, *dc in the next 3 sts, 2dc into the next st. Repeat * around. Sl-st to the top of ch3.
Round 6:  Ch3, dc in the same st as ch3, *dc in the next 4 sts, 2dc into the next st. Repeat * around. Sl-st to the top of ch3.
Round 7:  Ch3, dc in the same st as ch3, *dc in the next 5 sts, 2dc into the next st. Repeat * around. Sl-st to the top of ch3.
Round 8-15:  Ch3, dc in each st around. Repeat * around. Sl-st to the top of ch3.
Fasten-off after round  15 and weave ends using tapestry needle.

Note:
You can make larger size by adding more rows before round 8 until you reach the desired head circumference. This means increasing the number of dc in between 2dc.

Hat height can be increased too by adding several rows after row 15.

For the earflaps:
From the sl-st of dcround 15, count 8 stitches to the left. Attach the blue yarn and make ch3.
Round 1. Dc2tog on the next 2 sts, dc on the next 10 sts, dc2tog on the next 2 sts.
Round 2. Ch3, turn. dc2tog on the same sts as ch3 and the next st, dc on the next sts until only two sts remained, dc2tog on these last 2 sts.
Succeeding rounds. Repeat round 2 until only single dc2tog on the last round. 
Do edging thru sc around the earflap. 
Do this on the opposite side.

Using white yarn, do edging around including the earflaps.

Using the three colors of yarn used - red, white, and blue, connect to the earflap and make a braid of your desired length.

For the circle:
Using red yarn, make ch30, sl-st to the first chain to create a loop.
Round 1. Ch2, hdc in each st. Sl-on top of ch2.
Round 2. Connect white yarn, ch2. Hdc on the same st as ch2, 2hdc in each st around. Sl-st on top of ch2.
Round 3. Connect red yarn, ch2. Sc on the same st as ch2, sc in each st around. Sl-st on top of ch2. Fasten off and weave end using tapestry needle.

For the star:
Ch4, sl-st on the first chain to make a loop.
Round 1. Ch4, 15 dc to loop. Sl-st to the top of ch4.
Round 2. Ch7, sl-st on the 2nd ch from the hook, sl-st on the next st, sc on the next, hdc on the next, dc on the next and tc on the next st. Skip two sts and sl-st on the next st of round 1. Do the same four more time to create a star.

Sew the red-white circle on from of the hat then sew the star at the center of the circle.
Read More »

Crochet White Doll Booties and Headband Set


It's been a while since I shared our crochet projects here. So let me share this cute set of white doll booties and headband set.
crochet, baby booties, headband
Crochet White Doll Booties and Headband Set
Attached to the booties and headband are crochet rose flower.

Crochet White Doll Booties with Red Rose
I made a bigger rose flower for the headband.


Crochet White Doll Booties with Red Rose
For designs at Mom and Dad Crochet Facebook page.

Read More »

Slouchy Hat


I just want to share another type of hat that we included in our made-to-order list- The Slouchy Hats. 

One of our work colleagues asked if we can make these types of hat. She showed us the photo she got from the internet. I examined the type of stitch used first before committing. It only used shell stitches. I accepted the order.

Slouchy Hat shown to us
With some modifications, here are the finished products.

Crochet Slouchy Hat
Crochet Slouchy Hat
Crochet Slouchy Hat
I will try to create a pattern for this one.

For more designs and how to order you can visit our Mom and Dad Crochet Facebook Page.
Read More »

First Crochet Centerpiece


One day, somebody asked us if we can make a crochet rag. She sent us the photo which looks like this:

Photo sent by an inquiring customer

I tried browsing the net if there are available pattern but I cannot find such pattern one for this. I just take a closer look on the photo and tried to make a miniature version using cotton yarn.


Here is the finished product: 

My first centerpiece

Does it look like the one in the photo above?

For those who would like to ask for a pattern, I will try to make a diagram or sketch for this one. It is hard to make a written one since there are some complicated stitches used.

As of now, I am doing granny squares to be placed in our TV rack. I will share the finished product soon. For the mean time, here is a photo of my WIP.

Granny Squares for our TV rack.
Read More »

Crochet Minion Diaper Cover, Hat and Boots Set


Missin' our crochet projects?

Here are our latest MTO, crochet Minion diaper cover, hat and boots set.

Crochet Minion Diaper Cover, Hat and Boots Set


Here's the crochet diaper cover jumper.

Crochet diaper cover jumper

The crochet Minion hat is one of our best sellers.

Crochet Minion hat

And the latest addition to our boots, crochet Minion cuffed boots. You can find the free pattern of cuffed boots here.

Crochet Minion cuffed boots
That's it! More crochet photos next time.
Read More »

Reading Crochet Symbol Chart


I’ve been into crocheting for more than two years now. There are times I can figure how to do it by simply looking at the photo samples. However, if I were to rate myself, I am still 8 out of 10. I still search for patterns online especially for the items very new to me.

Some patterns are in diagram form instead of text ones. So the problem arises because I cannot read such diagrams.

Then I saw this chart:

Crochet Symbol (DMC)

This made me realize that diagram pattern is much simple than text ones. This will also make me create and share patterns here much easier.

The next time I saw patterns like this...

Source: BabyBlog

and this,

Source: Trico and Crochet - madonna mine

and whatever language it is written as long as I have the chart, crocheting will still be fun.


Can you read diagram patterns too?
Read More »

Little Iron Man Amigurumi


Little Iron Man Amigurumi
I promised Matt that I will make an Iron Man crochet item since it was one of his favorites. I was thinking of making a hat but Mommy asked me to make a little amigurumi so it will be hung on his bag. Mommy had already made an Iron Man mask for him. 

Some might be asking what is an amigurumi?

"Amigurumi (crocheted or knitted stuffed toy) is the Japanese art of knitting or crocheting small stuffed animals and anthropomorphic creatures. The word is derived from a combination of the Japanese words ami, meaning crocheted or knitted, andnuigurumi, meaning stuffed doll. Amigurumi are typically animals, but can include artistic renderings or inanimate objects endowed with anthropomorphic features, as is typical in Japanese culture." (Wikipedia)

I searched the net for a free pattern. Luckily, I found one at LittleYarn Friends but I made some variation though. Instead of using felt cloth for the face and eyes, I made it crochet too.

After finishing the made-to-order felt cloth letters, I started doing the amigurumi. He was so excited watching me crocheting and keep on saying: “Daddy, bilisan pong tapusin yung Iron Man ko.”

Last Saturday night, I finished it but he wasn’t able to saw it. He went to bed early that night for he was sick. When he woke-up the following day, parang nawala ang sakit nya and immediately grabs it.

I asked him if we will place it on his bag but he refused. Hahawakan na lang daw nya. Where ever he goes, he always had it on his hands. 

Matthew and the Little Iron Man

He even draws it.

Matthew drawing Little Iron Man

Now, I am working on making another of his favorites - Spiderman but he asked another one, Doraemon naman daw pagkatapos!

Who are your kids’ favorite superheroes?
Read More »